If you’re considering outdoor security upgrades, a solar security camera is one of the smartest moves a homeowner can make. Unlike traditional wired systems that demand electrical infrastructure and constant power costs, solar-powered models operate independently, charge during daylight, and eliminate the hassle of running cables through walls or along rooflines. Whether you’re securing a backyard, driveway, or perimeter, solar security cameras offer practical advantages that traditional options simply can’t match, especially in 2026, when the technology has matured and prices have dropped significantly. This guide walks you through what makes these systems different, how they’ll save money over time, and how to install and maintain them like a seasoned homeowner.
Table of Contents
ToggleKey Takeaways
- A solar security camera outdoor system eliminates the need for trenching, electrical permits, and monthly power costs, making it accessible for DIY installation in under an hour per camera.
- Over five years, solar security camera setups save homeowners $3,000–$5,000 compared to traditional wired systems, with most installations breaking even in 18–24 months.
- Solar cameras require direct sunlight (4–6 hours daily) and should be mounted facing south in the Northern Hemisphere for optimal battery charging and reliable operation.
- Modern solar security cameras feature AI-powered motion detection, person detection, two-way audio, and cloud storage with 24/7 app access, providing active monitoring without a dedicated DVR system.
- Minimal maintenance—quarterly lens and solar panel cleaning plus monthly battery checks—keeps solar cameras operating at peak efficiency for 2–3 years before battery replacement becomes necessary.
What Makes Solar Security Cameras Different From Traditional Options
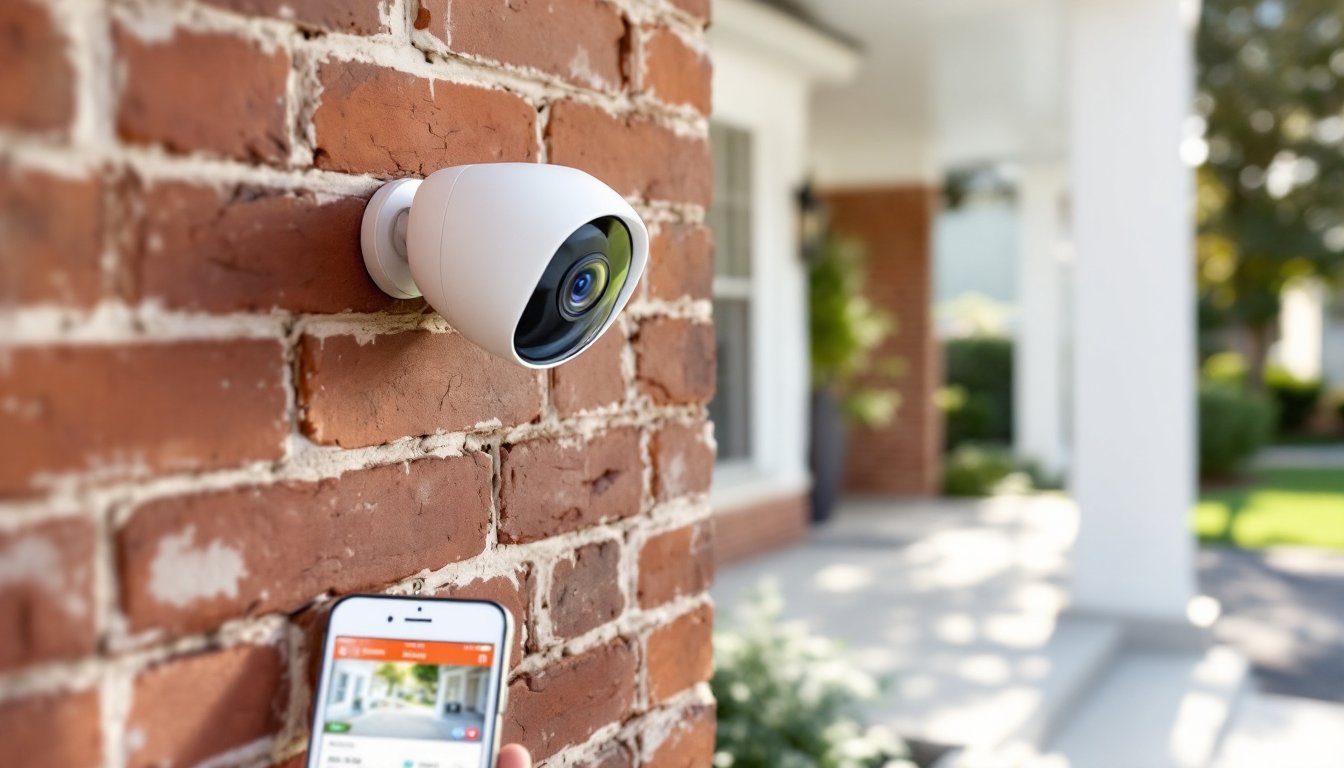
A traditional hardwired security camera needs power run to it, usually via 12V or 24V lines buried underground or run through conduit. That means trenching, conduit work, and a licensed electrician in many jurisdictions. A solar security camera, by contrast, sits on your roof or fence post with a built-in solar panel and rechargeable lithium battery pack (typically 2000–5000 mAh). The panel charges during the day: the battery powers the camera at night and on cloudy stretches.
The practical difference is freedom. You mount it where you need it, not where power exists. No trenching, no permits for electrical work, no monthly electricity draw. The camera records to cloud storage (WiFi-enabled) or a local microSD card, so you’re watching your property from your phone without a dedicated DVR box humming away in a closet.
That said, solar cameras aren’t magic. They need sunlight, at least 4–6 hours daily for reliable charging in temperate climates. If your setup is heavily shaded or you live in a notably dim region, battery life will drop. They’re also slightly bulkier than wired cameras because the panel and battery are integrated. But for 80% of homeowners in typical climates, the trade-offs are worth it.
Energy Efficiency and Cost Savings Over Time
Let’s talk money. A traditional wired camera system, with trenching, conduit, electrician labor, and a power draw of 5–10 watts per camera, costs roughly $1,500–$3,000 to install for a two-camera setup and runs about $15–$30 per month in electricity.
A solar camera runs $200–$600 per unit depending on features (4K, dual-lens, person detection). Installation is DIY: mount the bracket, plug in the solar panel, and connect via WiFi. Over five years, a wired system costs around $5,400–$7,800 (installation plus power). A solar setup runs $1,000–$3,000 upfront with nearly zero ongoing energy cost.
That’s a $3,000–$5,000 advantage for solar over a half-decade. Most homeowners break even in 18–24 months when factoring in avoided electrical work. Top-rated models reviewed on leading security publications show that battery longevity, typically 2–3 years before degradation, is improving fast, pushing lifetime savings even higher.
One caveat: cloud storage usually costs money (typically $3–$10/month per camera for rolling 30-day footage). Factor that into your true cost, but it’s still cheaper than running electrical wire.
Installation Considerations for Homeowners
Here’s where solar security cameras shine for DIYers. No permit, no licensed electrician required (in most jurisdictions, check local code). Most installations take under an hour per camera.
Typical installation steps:
- Choose your mount location (eave, fence post, gutter bracket, or wall).
- Use a level and measure twice, height should be 8–10 feet for optimal viewing angle and to deter tampering.
- Secure the bracket with stainless steel fasteners and concrete anchors (for masonry) or lag bolts (for wood). Cheap hardware rusts fast in outdoor weather.
- Attach the camera and solar panel arm to the bracket. Most systems allow pan-tilt adjustment before final tightening.
- Power on and connect to WiFi via the manufacturer’s app.
- Test motion detection and recording, then adjust sensitivity and zones as needed.
What you’ll need:
- Cordless drill (with masonry and wood bits)
- Level
- Tape measure
- Adjustable wrench
- Safety glasses and gloves
- Ladder (6–8 feet minimum)
Mounting note: Unlike traditional wired cameras, solar models must face south (in the Northern Hemisphere) for maximum sun exposure. East or west works in a pinch, but north-facing kills charging efficiency. Plan your placement around sunlight, not just camera angle.
Monitoring Your Property With Smart Features
Modern solar security cameras aren’t just passive recorders, they’re active monitors. Most include motion detection, person detection (using AI to ignore pets and wind-blown leaves), and two-way audio so you can talk through the speaker to delivery drivers or warn off intruders.
Cloud storage is standard. You get 24/7 access via app, live-stream capability, and playback of recorded events. Some systems offer local recording to an SD card as backup, which is smart if your WiFi goes down or you want offline privacy.
Setup is intuitive on most modern models. You’ll name each camera, set motion zones (so your mailbox flag doesn’t trigger false alerts), adjust sensitivity, and choose notification frequency. After the first week, you’ll know exactly which settings reduce noise without missing real activity.
One consideration: WiFi strength matters. A solar camera 50 feet from your router on the far side of a brick wall will struggle with lag. Many systems support 2.4 GHz WiFi extenders or a second WiFi network just for security gear. It’s a minor detail that makes a huge difference in reliability. Manufacturers featured on major tech review sites highlight WiFi range and stability as primary selling points.
Maintenance Tips to Keep Your System Running Strong
Solar cameras need minimal upkeep compared to wired systems, but they’re not maintenance-free.
Battery health:
Lithium batteries degrade over time. Most systems last 2–3 years before noticeably shorter runtime on cloudy days. Check the battery status in your app monthly. If you see it dipping below 80% charge on clear days, cleaning the solar panel (below) usually fixes it. If not, replacement batteries typically cost $50–$150 and are DIY-swappable.
Solar panel cleaning:
Dirt, dust, bird droppings, and tree sap cut charging efficiency fast. Clean your solar panel every 3–4 months (monthly if you’re near trees or dusty roads). Use distilled water and a soft cloth, no harsh chemicals or abrasive scrubbers. A simple wipe takes 2 minutes and keeps output at 95%+ efficiency.
Lens and weatherproofing:
Wipe the camera lens quarterly to prevent fogging and dust buildup. Most solar cameras are rated IP65 or IP67 (dust-proof and water-resistant), but that rating assumes clean seals. Check caulk around the mounting bracket annually: if cracks appear, re-seal with outdoor-grade silicone.
Firmware updates:
Manufacturers push security patches and feature updates via the app. Enable automatic updates, or manually check monthly. A camera running old firmware is a security liability.
Independent reviews on CNET and similar outlets note that user maintenance habits directly impact long-term reliability. Simple quarterly checks prevent 90% of issues.
Conclusion
Solar security cameras are no longer a niche product, they’re a mature, cost-effective choice for outdoor monitoring. They eliminate the hassle of running power, save thousands over five years, and install in an afternoon without permits. Install them where you need them, keep the solar panel clean, and monitor from your phone. For most homeowners, that’s everything a practical security system should be.