If you’re thinking about setting up a home security system without the headache of running cables or paying for professional installation, the Blink Outdoor wireless camera deserves a look. It’s designed to be straightforward enough for DIY installation, no electrician required, while delivering solid video quality and smart features that actually work. This guide walks you through everything from unpacking to optimization, so you can get your camera mounted, connected, and watching over your home in less than an hour. Whether you’re covering your front porch, driveway, or backyard, we’ll show you exactly how to do it right the first time.
Table of Contents
ToggleKey Takeaways
- The Blink Outdoor wireless camera offers DIY installation without cables or professional help, recording in 1080p HD with night vision and a 110-degree field of view for solid home security coverage.
- Before installation, confirm your WiFi supports 2.4 GHz, test signal strength at the mounting location, and gather essential equipment including AA batteries, the Sync Module, and the Blink app.
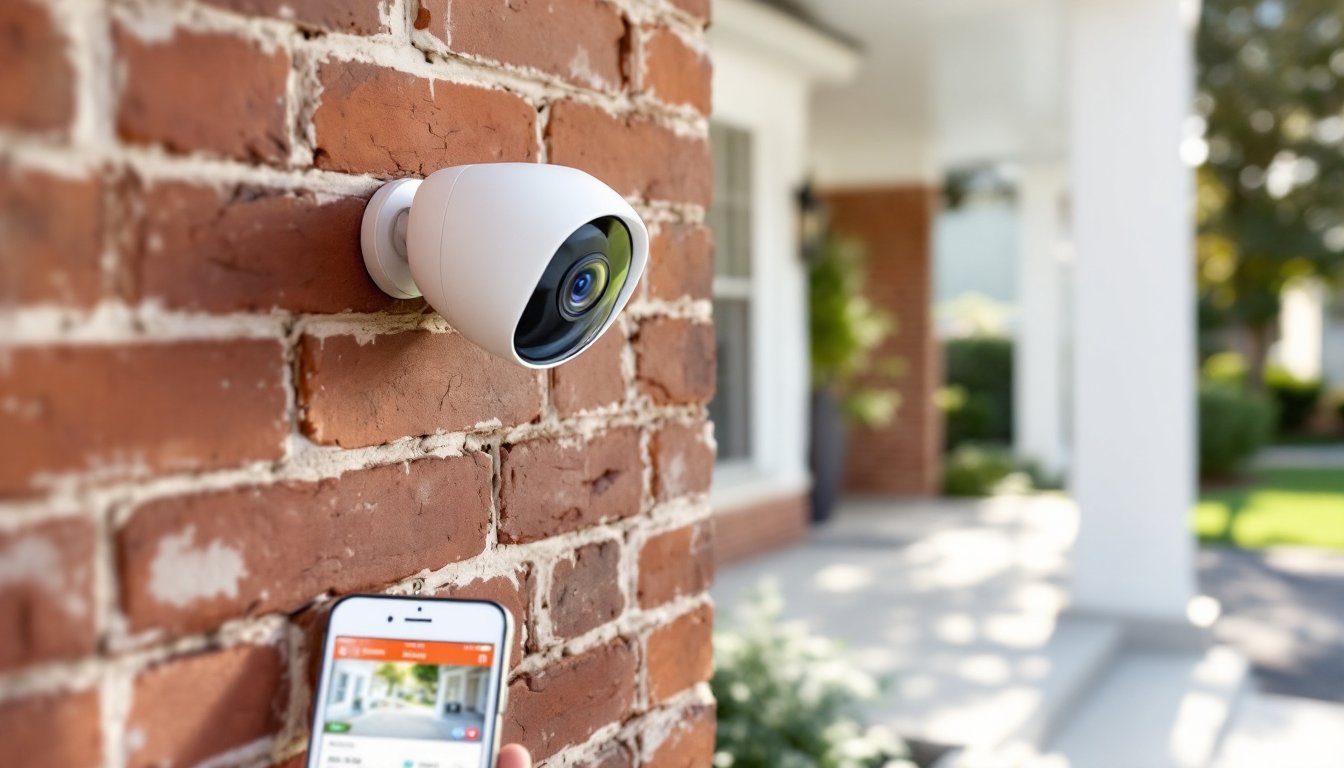
- Mount the camera 8–10 feet high with a clear sightline to your monitoring area, tilting it slightly downward to capture faces and packages at eye level for optimal coverage.
- Optimize your wireless connection by maintaining WiFi signal strength above 3 bars, adjusting motion detection sensitivity to reduce false alerts, and testing two-way audio before relying on it.
- Address common issues like WiFi dropouts or poor night vision by repositioning the Sync Module closer to your router, checking signal strength in the Blink app, and keeping the lens clean with a soft cloth.
- Replace batteries promptly when alerted, perform seasonal maintenance to protect from frost and sun damage, and note that cloud storage recordings beyond 30 seconds require a paid subscription.
What Makes The Blink Outdoor Camera Stand Out
The Blink Outdoor camera strips away unnecessary complexity while keeping the features that matter. It runs on AA batteries, not wall power, which eliminates the need to run wiring to your mounting location. Battery life typically lasts a year or more, depending on activity levels, so you’re not constantly troubleshooting power issues.
For video quality, the camera records in 1080p HD, which is more than enough to identify a face or read a package label. Night vision uses infrared to keep recording when it’s dark, and the 110-degree field of view captures a wide area without requiring a wide-angle fisheye distortion that’s hard on the eyes.
What sets it apart from pricier options is the motion detection and two-way audio. You get instant notifications on your phone when motion is detected, and you can speak through the camera speaker to deter someone or ask a delivery driver to set a package on the porch. Recent reviews highlight the video quality improvements in the latest models, making them competitive with cameras costing twice the price.
The camera integrates with Amazon Alexa, so you can check your camera feed through an Echo Show or ask Alexa to play back recent clips. It’s a nice convenience if you’re already in the Alexa ecosystem, though not essential for basic security.
Essential Equipment & Compatibility Requirements
What You’ll Need Before Installation
Before you mount anything, confirm you have the right gear and your setup will actually work.
Core equipment:
- Blink Outdoor camera (comes with the bracket and all mounting hardware, screws, washers, and wall anchors for drywall or masonry)
- Four AA lithium or alkaline batteries (alkaline is fine: lithium lasts longer in cold weather)
- Smartphone with the Blink app installed (iOS or Android)
- Reliable WiFi with 2.4 GHz support (most modern routers have this: some 5 GHz-only networks won’t work with Blink)
- Blink Sync Module (a small hub that talks to your camera and your home WiFi: it plugs into any outlet within range)
- Security in the form of a wired router or WiFi extender, if your mounting location is far from your router
Optional but helpful:
- A small level (smartphone levels work if you don’t have a real one)
- A cordless drill with bits (hand-driving screws works, but a drill is faster)
- Painter’s tape (to mark mounting height and angle before drilling)
Compatibility check:
Your WiFi must support 2.4 GHz, check your router settings if you’re unsure. Blink cameras don’t connect to 5 GHz bands. If your WiFi signal is weak at the mounting location, the camera will drop connection repeatedly. Test your signal strength at that exact spot before you drill holes: if your phone barely gets WiFi there, reconsider the location or add a WiFi extender.
The Sync Module must be plugged in within range of your WiFi router and should have a clear line of communication to the camera. It doesn’t need to be where the camera is, a hallway outlet 50 feet away is fine. Multiple modules can link one Blink system, useful for larger properties.
Step-By-Step Installation Guide
Mounting Your Camera For Optimal Coverage
Step 1: Choose your mounting location. Pick a spot 8–10 feet high on the wall where the camera has a clear sightline to the area you want to monitor. Avoid pointing it directly at bright sunlight, which washes out video. An overhang or soffit is ideal: if the camera is in direct rain, use the optional weatherproof housing or ensure water can’t pool around the mounting bracket.
Step 2: Mark and level your holes. Hold the mounting bracket at the height you want. Use painter’s tape to mark the two screw holes. Use a level to ensure the bracket is square, a tilted camera looks unprofessional and misses critical areas. Step back and imagine the coverage area: aim slightly downward (about 15 degrees) to catch faces and packages at eye level.
Step 3: Drill pilot holes. If you’re mounting to drywall, use the plastic anchors provided: pre-drill with a bit slightly smaller than the anchor diameter. For brick or masonry, use a masonry bit and tap the anchors in gently. Avoid studs unless you’re using the included hardware, studs are overkill and waste fasteners.
Step 4: Mount the bracket. Drive the screws through the bracket into your anchors, hand-tight plus a quarter turn. Over-tightening cracks drywall or strips plastic anchors. The bracket should not move if you push on it, but it shouldn’t feel like you’re forcing it either.
Step 5: Snap the camera into the bracket. The Blink camera slides onto the bracket and locks with a satisfying click. There’s no separate power step, the bracket is passive. Adjust the ball joint to your desired angle, then tighten the adjustment screw on the bracket until the camera doesn’t drift. It should stay put even if someone bumps the wall.
Step 6: Install batteries and sync. Open the camera’s battery compartment (on the back), insert four AA batteries, and hold the reset button for 5 seconds until the LED flashes amber. Open the Blink app, add a new camera, and scan the QR code on the back of the unit. Follow the app prompts to connect the camera to the Sync Module. Connection typically takes 1–2 minutes. When the LED turns solid blue, the camera is online.
Common snag: If the camera won’t sync, confirm the Sync Module is plugged in and connected to your WiFi network first. Then try again. The app guides you through each step, so there’s little room for error.
Optimizing Your Wireless Connection & Settings
Once your camera is online, a few tweaks make it far more useful.
WiFi strength matters. Open the camera settings in the app and check the WiFi signal strength (usually shown as a number from 1 to 5 bars). Anything below 3 bars is risky, you’ll see dropped connections and delayed notifications. If signal is weak, relocate the Sync Module closer to your WiFi router, or add a WiFi extender near the camera’s mounting location. Moving the module 10 feet can make a huge difference.
Motion detection tuning. The default sensitivity is moderate, but it might trigger on wind-blown trees or passing cars. Open the motion settings and adjust the sensitivity slider to match your needs. Lower sensitivity means fewer false alerts. You can also draw activity zones in the app, outline just the driveway or doorway, for example, so tree movement doesn’t trigger alerts.
Two-way audio setup. Test your microphone and speaker before you rely on them. Go outside the camera’s range, then open the app and speak into your phone. You should hear yourself through the camera’s speaker. If sound is weak, the camera might be too far from your router. Test it in daylight first: wind noise and distance degrade audio quality, so keep expectations realistic.
Night vision mode. Blink defaults to automatic night vision, which engages when light drops below a threshold. It works well, but if your outdoor lighting is inconsistent, you can switch to manual night vision in settings. This ensures consistent video quality whether or not your porch light is on.
Cloud storage and local backup. By default, recorded clips save to Blink’s cloud, which requires a subscription. You can review the last 30 seconds of a motion event for free, but longer recordings or cloud storage cost extra. Consider your needs before committing to a paid plan. Privacy and performance considerations vary by setup, so read the privacy settings carefully if that matters to you.
Maintenance Tips & Troubleshooting Common Issues
Battery replacement. When the app alerts you that batteries are low, swap them out promptly. Keep a spare set of AA batteries in a drawer near the camera for quick access. Lithium batteries last longer in cold climates and cost a bit more, worth it if your camera is in Minnesota or upstate New York.
Lens cleaning. Every few months, especially after rain or dusty weather, wipe the lens with a soft, dry cloth. A dirty lens degrades video quality faster than you’d expect. Don’t use water or solvents, just a microfiber cloth works fine.
WiFi dropout troubleshooting. If your camera keeps going offline, the issue is almost always WiFi range or signal strength. Check the WiFi settings in the Blink app. If signal is below 3 bars, reposition the Sync Module or add a WiFi extender. Restart your router by unplugging it for 30 seconds, then plug it back in. This fixes most connectivity hiccups.
Camera won’t respond in the app. Press the reset button on the camera for 5 seconds, then re-sync it with the Sync Module through the app. If it still doesn’t connect, remove the batteries for 30 seconds, reinstall them, and try again. Rarely, a firmware update will reset the camera automatically, check the app notification log.
Video quality looks poor at night. Ensure night vision is on. If video is grainy even with night vision enabled, WiFi signal is likely too weak. Move the Sync Module closer to the router or the camera closer to the module. Weak signal forces the camera to lower video quality to save bandwidth.
Two-way audio lag or no sound. Audio delay of 1–2 seconds is normal. If there’s no sound at all, check the app’s audio settings to ensure the microphone is on. Test with the camera nearby first: if audio works indoors but fails outdoors, WiFi signal is the culprit.
Most issues resolve by repositioning the Sync Module or checking WiFi signal. Don’t overlook the simple fixes, they work more often than you’d expect. Independent testing of security camera performance confirms that setup and placement drive user satisfaction far more than the camera’s hardware alone.
Seasonal care. In winter, keep the camera lens clear of frost or snow. In summer, ensure it’s not facing into harsh afternoon sun, which can degrade image quality and overheat the camera. A small overhang or gutter shade helps in direct sun.