If your home sits at the end of a long driveway or you’re renting a place without internet access, traditional WiFi security cameras won’t cut it. Cellular security cameras solve that problem by using your cell network to transmit footage, no WiFi router required. Whether you’re protecting a vacation cabin, monitoring a detached garage, or keeping tabs on your front entrance from hundreds of miles away, cellular outdoor security cameras deliver reliable surveillance where traditional cameras fall short. This guide walks you through everything you need to know to choose, install, and maintain a cellular security camera system for your property.
Table of Contents
ToggleKey Takeaways
- Cellular security cameras eliminate the need for WiFi or ethernet infrastructure, making them ideal for remote properties, vacation cabins, and locations where traditional wired systems are impractical.
- A cellular outdoor security camera transmits video through a built-in SIM card via 4G LTE or 5G networks directly to your smartphone, enabling real-time alerts and live footage access from anywhere.
- When selecting a cellular security camera, prioritize IP65 or IP67 weather resistance, night vision capabilities, at least 1080p resolution, and battery life of 2–4 months between charges.
- Installation requires testing cell signal strength (aim for 2–3 bars minimum), mounting at 8–12 feet height with a slight downward angle, and using appropriate fasteners for your surface material.
- Cellular camera systems involve upfront hardware costs of $100–$500 plus mandatory monthly service plans ranging from $10–$50 per camera depending on cloud storage and streaming quality.
- Start with a single camera and basic plan to test coverage and data usage at your property before scaling up, and factor in seasonal weather impacts that may increase activity-based data consumption.
What Are Cellular Security Cameras and How Do They Work?
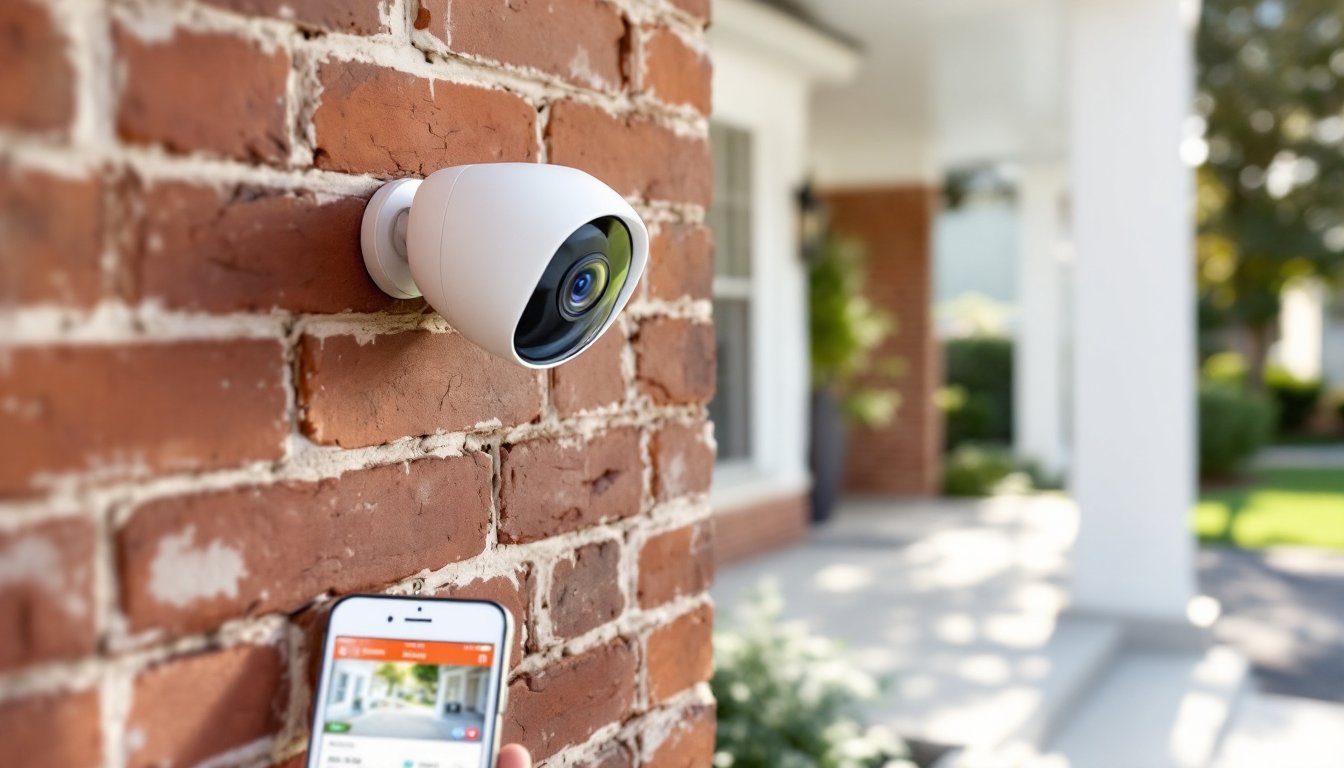
A cellular security camera is a standalone surveillance device that transmits video and alerts over a 4G LTE or 5G cellular network instead of relying on WiFi. Think of it as a security camera with a built-in cell phone, it communicates with your smartphone directly through the cellular infrastructure.
Here’s how it works in practice: The camera captures video continuously or on motion trigger, then sends footage through a SIM card embedded in the device to a cloud server or your phone app. You receive real-time alerts whenever motion is detected, and you can pull up live or recorded footage anytime from your smartphone, regardless of whether you have WiFi at the property.
Unlike traditional wired cameras or WiFi-dependent systems, cellular cameras don’t need ethernet cables, network infrastructure, or router setup. They’re entirely self-contained, which makes them perfect for remote properties or locations where running wires is impractical. Most cellular cameras run on rechargeable batteries or solar power, adding another layer of independence from your home’s electrical system.
Why Cellular Cameras Are Ideal for Remote Monitoring
The biggest advantage is independence from WiFi. A remote cabin, construction site, or rural property without broadband coverage can still have professional-grade security. You’re not limited by router range or network speed.
Cellular cameras also offer flexibility in placement. You can position them anywhere on your property where cell signal exists, no need to run cables to a central hub or stay within WiFi range. This freedom makes them ideal for monitoring detached buildings, gateways, parking areas, or multiple properties from one app.
Another practical benefit is ease of temporary deployment. Renting a property, managing a short-term vacation rental, or monitoring a seasonal structure? Cellular cameras mount quickly without permanent installation. Unscrew them, move them, and re-install at the next location.
Recent studies on home security trends show that homeowners increasingly prefer cellular cameras for second homes and remote land. The data integration with cloud storage also means footage persists even if the camera is damaged or stolen, your evidence stays safe in the cloud.
Key Features to Look for When Choosing an Outdoor Cellular Camera
When shopping for an outdoor cellular security camera, focus on these core features:
4G LTE or 5G connectivity: Ensure the camera supports your region’s primary cellular bands. Check with your carrier (Verizon, AT&T, T-Mobile) about which devices work on their networks. 5G cameras offer faster streaming but may cost more and require 5G coverage in your area, currently limited in rural zones.
Weather resistance: Look for IP65 or IP67 rating (the first number is dust, the second is water). IP65 handles rain and dust: IP67 is fully waterproof and can survive submersion. All outdoor cameras should meet at least IP65.
Night vision: Infrared (IR) night vision is standard: check the range (typically 20–50 feet). Color night vision is newer and more expensive but worth it if you need to identify specific details in dark conditions.
Resolution: 1080p is minimum for identifying faces at moderate distance: 2K or 4K provides better detail but uses more data and battery. Consider your property size and monitoring priorities.
Battery life and charging options: Rechargeable batteries typically last 2–4 months between charges, depending on activity. Solar panels or continuous power adapters extend runtime indefinitely. For permanent outdoor installation, a solar option is worthwhile.
Field of view (FOV): Wider angles (100–180 degrees) cover more ground but show less detail. Narrower angles (60–90 degrees) capture finer details. Many top cellular security cameras offer adjustable or multi-camera setups to balance both.
Cloud storage and app: Check data limits, video retention periods, and ease of playback. Some plans include continuous recording: others cap footage. Test the mobile app’s responsiveness and alert customization before committing.
Installation Tips for Outdoor Cellular Security Cameras
Pre-installation prep:
- Test cell signal at the mounting location using your smartphone. Walk around the property with a signal meter app, aim for at least 2–3 bars. Dead zones will cripple your camera’s upload performance.
- Check mounting height and angle. Elevate the camera 8–12 feet if possible to avoid easy tampering and get a better overview. Angle down slightly (20–30 degrees) to capture faces and vehicles rather than just the ground.
- Gather tools: drill with bits matching your wall anchors, level, tape measure, Phillips and flathead screwdrivers, safety glasses, and work gloves if drilling into brick or stone.
Installation steps:
- Mount the bracket using the appropriate fasteners for your surface (stainless-steel anchors for brick, concrete bolts for masonry, lag bolts for wood). Use a level to ensure it’s straight.
- Attach the camera body and secure any safety cables or locks provided by the manufacturer, prevents theft.
- Activate the SIM card by following the manufacturer’s instructions. Most use pre-activated cards: some require a one-time setup through their website.
- Connect via the mobile app, perform a focus test with the camera pointed at a known target, and confirm live streaming works.
- Position and angle finalize after confirming video quality in the app. Adjust the pan/tilt mechanisms or reposition the bracket if the view is obstructed.
Safety reminders: Wear eye protection when drilling. If installing above an entrance or in high-traffic areas, use a stabilizing ladder and a safety harness if working above 8 feet. Check local building codes, some jurisdictions require permits for rooftop or exterior installations, especially in HOA communities.
Cost Considerations and Monthly Service Plans
Cellular camera hardware costs range from $100–$500 depending on resolution, features, and brand. Solar-powered models or those with premium night vision sit at the higher end.
Monthly service plans are mandatory and typically run $10–$50 per camera, depending on data limits and cloud storage capacity. Most providers offer tiered options:
- Basic plans ($10–$20/month): Motion detection, limited cloud storage (7–30 days), lower resolution streaming to save data.
- Mid-tier plans ($20–$35/month): Higher resolution streaming, 60–90 days of cloud storage, person/vehicle detection AI.
- Premium plans ($35–$50/month): Continuous 24/7 recording, 365-day cloud retention, advanced analytics.
Data usage varies widely, a camera recording 12 hours per day at 1080p might consume 5–15 GB monthly depending on compression and activity levels. Check whether your carrier offers unlimited data or if you’ll hit overages. Some camera manufacturers offer bundled plans through partnerships: for instance, a 4G LTE cellular camera from a major brand might include its own carrier partnerships with discounted rates.
Budget tip: Start with one camera and one basic plan to test coverage and data usage at your property. Scaling up is easier once you understand your actual needs. Factor in seasonal weather impacts, harsh winters or dust storms increase data consumption due to activity triggers.
Conclusion
Cellular outdoor security cameras remove the WiFi barrier and let you monitor remote properties with professional-grade surveillance. They’re practical for rural homes, vacation properties, and any location where traditional cameras fall short. Start by assessing cell signal strength at your installation site, choose a camera that balances resolution and battery life with your budget, and plan for the ongoing service costs before committing. Proper mounting, safety precautions, and realistic expectations about data usage will set you up for reliable long-term protection.