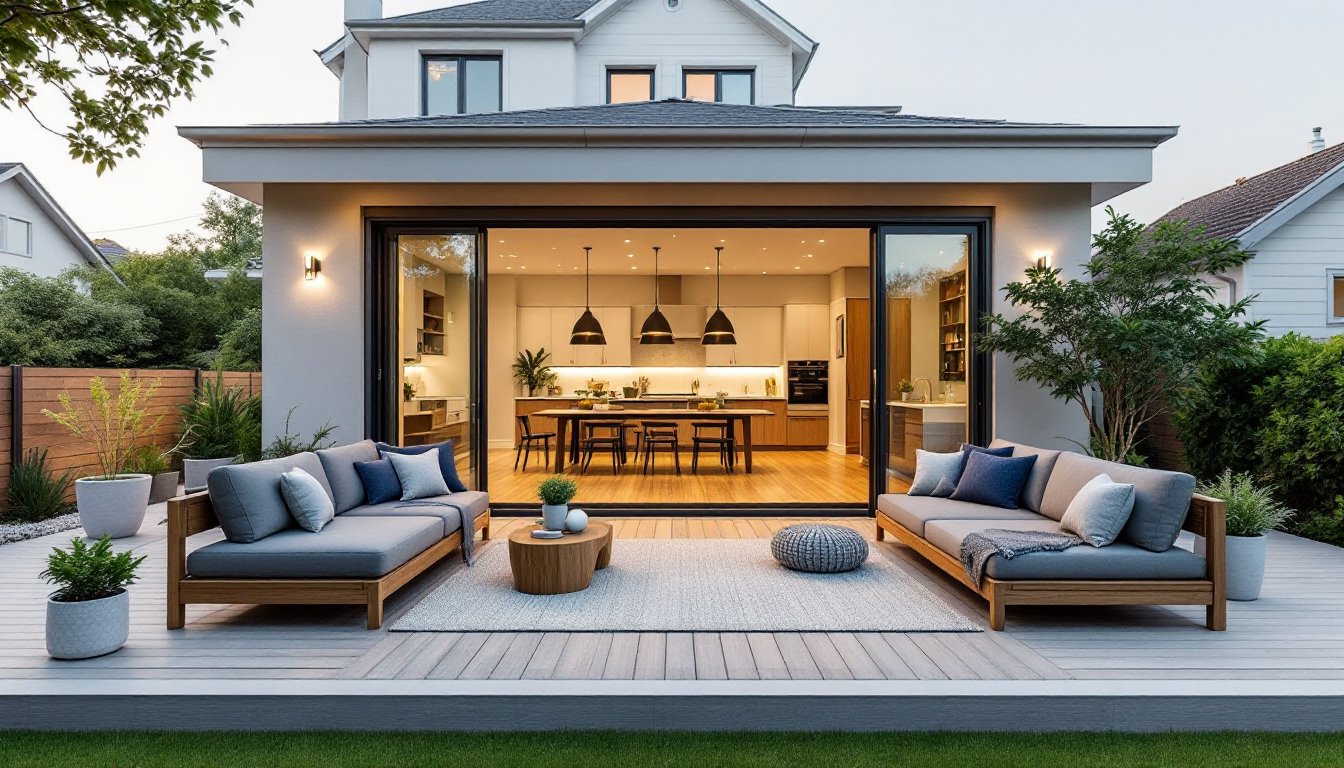
Building a Weber outdoor kitchen transforms your backyard into a functional entertainment space where you can cook, gather, and relax. Whether you’re a grilling enthusiast or someone looking to upgrade their outdoor living area, a Weber outdoor kitchen combines quality equipment with smart layout design to create a space that works as hard as you do. This guide walks you through the essentials, from choosing the right components to planning your layout and handling installation, so you can build a setup that fits your backyard and lifestyle.
Table of Contents
ToggleKey Takeaways
- A Weber outdoor kitchen centerpiece delivers consistent performance and holds its value better than mismatched equipment while encouraging more frequent entertaining and outdoor living.
- Proper grill placement requires at least 10 feet of clearance from your house, overhanging branches, and vinyl siding, with 36 inches minimum clearance on the cooking side for safe and comfortable food preparation.
- Plan for 8 × 6 feet minimum space with logical workflow zones: prep on one side, cooking in the center, and plating on the other, ensuring guest traffic stays clear of hot surfaces and steam.
- Include weatherproof storage cabinets beneath counters, utility drawers for tools, and consider a built-in beverage cooler to minimize trips to your indoor kitchen during entertaining.
- Use a level foundation with 4 inches of reinforced concrete or concrete pads, hire licensed professionals for electrical and gas line installations, and seal gaps with outdoor silicone to protect your investment long-term.
- Orientation matters year-round: position your Weber outdoor kitchen to minimize afternoon sun exposure, shelter from prevailing winds, and account for winter sun angles to maximize comfort and fuel efficiency.
Why Choose a Weber Outdoor Kitchen for Your Backyard
Weber grills have earned their reputation through decades of reliable design and heat management. When you’re building an outdoor kitchen, the centerpiece matters. Weber equipment delivers consistent performance, whether you’re searing steaks or smoking ribs, and integrates seamlessly into dedicated cooking spaces. Their modular approach lets you start with a single grill and expand over time, adding side burners, warming drawers, or storage modules as your budget allows.
A Weber outdoor kitchen also holds its value better than piecemeal setups. Buyers appreciate cohesive design, quality construction, and the confidence that comes with a trusted brand. Beyond resale appeal, you’ll find that purpose-built outdoor cooking spaces encourage more frequent entertaining. Friends and family gravitate to a well-designed cooking area, and you’re more likely to use equipment when it’s convenient and weather-protected. The investment pays for itself in the form of time spent outdoors and meals cooked at home.
Key Components Every Weber Outdoor Kitchen Needs
Grill Selection and Placement
Choose your grill type based on how you cook. Weber Genesis series grills suit everyday grilling and entertaining: they heat quickly and maintain consistent temperatures. Weber Smokefire models work better if you’re serious about smoking or low-and-slow cooking. For very large spaces or families, Genesis Platinum or Summit series offer more burners, better insulation, and upgraded controls.
Placement is non-negotiable for safety and usability. Position your grill at least 10 feet away from your house, overhanging branches, and vinyl siding. Ensure the grill sits on a level surface, use shims or adjust concrete pads as needed. Wind can affect performance, so orient the grill to minimize headwinds in your typical cooking position. Make sure there’s at least 36 inches of clearance on the cooking side for comfortable movement and food prep, and leave 18 inches minimum on non-cooking sides for service access.
Counter Space and Storage Solutions
Counter space directly impacts your workflow. Plan for at least 24 to 36 inches of prep space on one side of the grill and similar depth on the other for plating and resting finished food. Use stainless steel or composite materials for countertops, they withstand weather, resist staining, and won’t splinter. Arrange your counters in a logical sequence: prep on one side, cooking in the center, plating and serving on the other.
Storage matters more than it sounds. Build weatherproof cabinets beneath counters to hold propane tanks, utensils, cleaning supplies, and extra fuel. Open shelving works for items you use frequently: closed cabinets protect long-term storage from UV damage and moisture. Incorporate a drawer for grilling utensils, thermometers, and tongs, keeping tools accessible reduces frustration when you’re in the middle of cooking. Think about including a small beverage cooler or ice drawer built into your counter line: it keeps drinks cold without requiring trips to the indoor kitchen.
Planning Your Layout: Design Considerations
Space Requirements and Flow
Measure your space realistically before ordering equipment. A functional outdoor kitchen typically needs 8 feet × 6 feet minimum for a single-grill setup, though larger spaces allow for islands or L-shaped configurations. Account for clearance from property lines, fences, and easements, many jurisdictions require a certain distance from structures, and utility easements may restrict underground work. Check your local building codes: some areas require permits for built-in grills or electrical installations, even in residential backyards.
Flow matters as much as size. Design your kitchen so traffic doesn’t funnel directly in front of the grill. Create a pathway for guests that keeps them away from hot surfaces and steam. Arrange your layout so that prep, cooking, and serving zones form a logical sequence, you don’t want to walk dirty dishes back past raw food. If you’re building an island-style kitchen, leave at least 48 inches on all sides for comfortable movement.
Consider your yard’s sun and shade patterns. A grill in full afternoon sun can boost temperatures and make cooking uncomfortable in summer. Nearby shade, from a pergola, umbrella, or existing trees, provides relief. Factor in winter sun angles too: a winter meal grilled with afternoon sun in your face isn’t enjoyable. The best outdoor living space incorporates custom outdoor living spaces that adapt to seasonal patterns. Research from outdoor kitchen design guides shows that thoughtful orientation improves usability year-round. Think about prevailing winds, if your area gets strong afternoon westerlies, positioning the grill to shelter your cooking position makes a real difference in fuel efficiency and comfort.
Installation Basics and Materials You’ll Need
Site Preparation and Foundation
Don’t skip preparation. A level foundation prevents wobbling and ensures even heat distribution from your grill. For grills on decks or patios, use concrete pads or pavers rated for outdoor use, never install directly on wood or composite decking. If pouring new concrete, use 4 inches of reinforced concrete with proper drainage slope. For existing patios, fill low spots and clean the surface thoroughly. Any debris, loose mortar, or uneven sections will compromise your setup.
Essential Materials and Tools
You’ll need several standard materials: stainless steel fasteners (never use regular steel, which rusts), exterior-grade silicone or construction adhesive, and landscape fabric if your grill sits on soil or mulch. Have sturdy level, tape measure, shovel, and a wheelbarrow on hand. For cabinet installation, exterior screws and wood stain or composite decking (for frames) are essential. Most DIYers benefit from a second pair of hands, especially when positioning heavy equipment or installing cabinets, a full Genesis grill weighs 200+ pounds, and trying to level it solo invites mistakes.
Assembly and Electrical Considerations
Assemble your grill on the ground before mounting or installing into permanent cabinetry. Follow Weber’s instructions exactly, they’re designed for safety and performance. If you’re adding electrical elements like interior lighting, warming drawers, or refrigeration, run weatherproof outdoor-rated cable in PVC conduit and have a licensed electrician handle connections to your main panel. This isn’t a DIY shortcut, improper electrical work creates fire and shock hazards. Building codes require a dedicated 20-amp circuit for outdoor receptacles, and your inspector will verify this.
Gas line installation deserves caution too. If you’re running new gas lines from your main supply, have a licensed gas technician do the work and pressure-test all connections. Propane setups are simpler for DIYers, standard QCC fittings and tanks are meant for homeowner use, but always double-check connections for leaks using soapy water (bubbles indicate leaks: never use a flame). Incorporate Southern Living and Country Living design inspiration to tailor your kitchen’s aesthetic while maintaining these safety standards.
Finishing Touches
Once your core equipment is in place, seal any gaps between cabinets and the grill frame with flexible outdoor silicone, this keeps water from pooling. Paint or stain wooden frame elements with outdoor-rated finishes that handle UV exposure and moisture cycles. Install weather-resistant cabinet doors and drawer fronts, and apply clear sealant to any visible wood edges. These details protect your investment and ensure your outdoor kitchen looks polished for years.